Showing posts with label Main Dish. Show all posts

Wednesday, December 5, 2012

Macaroni and Cheese

I have had this recipe for quite a few years now, all thanks to my friend Scottie.  He had been working on a M & C recipe and this was what he came up with...it's amazing.  I cannot improve on it so I will share it with you as he did with me.  I will say,  I don't always have the exact amount of cheese.  In fact it's usually a wee bit over!  It's a wonderful recipe to make a day or two ahead and then all you need to do is pop it in the oven for a bit longer than usual.  I always, always, always double it.  Always.  It's that good.  Also, just as a side note, you're going to want to make sure you have a salad or veggie as a side to this meal.  The amount of cheese in it will stop a freight train from running on a regular schedule, never mind a human body.  Yes, I went there.  The family and I usually have roasted broccoli with lemon and it's fan-freaking-tastic!  This is a special occasion dish here...Thanksgiving, Christmas, Easter and for pot lucks so don't start complaining about the high calorie count.  Celebrate and enjoy!  Stay on the treadmill for a few extra minutes, you'll be fine.
Uncle Scottie's Mac and Cheese!


Here's What You Need:


  • 5 Tablespoons Butter
  • 4 Tablespoons AP Flour
  • 2 ½ cups Whole Milk
  • 5 ounces Gorgonzola, crumbled
  • 4 ounces Fontina, grated
  • ¼-½ teaspoon Cayenne or 1 Teaspoon Cajun Seasoning, or more to taste
  • 1 pound Rigatoni, I use "Mezzi Rigatoni" it's shorter and has lines!
  • 4 ounces Mozzarella, cut into small cubes
  • 4 ounces Parmesan, grated


I find that having a large pot of water boiling and at the ready helps with the timing of this whole process and then bring it down to simmer while you're making your cheese sauce.  I also prep all of the cheese so that once the white sauce is ready you can toss the cheese in and voila!  Cheese sauce!
I always ask my husband to help with this part!  ♥


In another large pot melt the butter, then with a whisk add in the flour.  Whisk away for a minute or so and then slowly add in your milk.  I rarely use whole milk but in this dish it's imperative.  Trust me.  I've tried making a lower fat version and it did not go over well.  You are going to need to watch over your pot of almost goodness now, keep whisking so nothing burns on the bottom of the pan.  The sauce will thicken up in 20 minutes or so, a bit longer if your doubling (which again, I highly recommend).  You can call on your inner Julia Childs and do that fancy french trick of coating the back of a wooden spoon and run your finger through the sauce on it to see if the line stays formed, if you'd like.  Talk with a french accent if you so choose, I won't judge.

Once your white sauce is thickened I want you to add in the Gorgonzola and stir it all in with the whisk to help break it up further.  Then add in the fontina.  Things are going to start getting ooey and gooey really quickly now and you can start doing a subtle happy dance.  Turn your heat off and add in your seasonings.  You all know by now that I like spicy foods so adjust to your liking.  Now if you happen to have a nice loaf of bread laying about and you want to dunk a piece in the sauce, to check for seasoning of course, then go right on ahead.

So your sauce is done, now just boil your noodles and you are in the home stretch.  You will want to cook them for a minute or two less than what the package says since they will be going into the oven for a bit of time too.  Drain and add them right back to the large pot I told you to get in the first place.  Now comes the cheese sauce, add it in with the noodles, combine well and then add in your Mozzarella.   Stir it.
See those little cubes of Mozzarella?  Oh happy day!!!


Your happy dance can get a little less subtle.  Grab a casserole dish and transfer your cheesy noodle goodness to it and use a scraper to get every last bit of sauce out of the pot.  Hell you can grab another hunk of bread and get it all.  Again, I won't judge.  Just don't.  Leave.  It.  In.  The.  Pot.

Now top it all with your grated Parmesan and cover it with tin foil.  Bake for 30-35 minutes or until bubbly then uncover for 15-20 to get the top nice and browned.  Don't forget that if you are making this ahead of time just stop short of baking it.  Put it in the fridge until you are ready.  It will need to bake for more like 45-50 minutes to get all bubbly and fabulous before browning the top.
Enjoy!

Bon Appetit...it's time to eat!
Kathi


Friday, August 31, 2012

Broccoli and Arugula "Cupcakes"

So it was a fairly normal Thursday at my house except for the nasty ragweed allergy season that has struck, oh and the poison ivy.  Yeah.  Poison freaking ivy.  I had gone to pick up the children from school and stopped by my favorite farm for my last load of veggies before Elizabeth went on vacation ***insert sadness***.

Anyways!  I went home, washed everything and started cooking my face off.  Not sure what the hell phase the moon was in but I started making 1 new dish that turned into 3 new dishes.  Alright, it could be the undiagnosed ADHD that I probably have but, whatever.  That's when it happened.  A knock at the back door, my dog going nuts and my neighbor, Kim, standing there with an enormous basket of veggies!  Obviously I welcomed her, and all the kale a girl could possibly want, into the house...and poured her a glass of wine.  I may or may not have then poured myself a vodka tonic but let me not get sidetracked.  Elizabeth, the best farmer on the planet, had sent her to me bearing gifts!  And what gifts they were!  I usually like going with one new recipe at a time but with everything staring me in the face I couldn't resist.  I had seen an intriguing recipe on Pinterest (shocker) for these baked cheddar broccoli rice cups and while I didn't have all the ingredients, it did get me thinking.  Love that!  This is my version of what came of it and I must say, it's amaze-balls!
This photo could totally be better but Kim insisted this needed to be my next post!  LOL!

Here's what you need:

  • 1½ cups Brown Jasmin Rice, cooked
  • 10 oz Broccoli, frozen or roughly 2 cups fresh, blanched.  I used fresh and chopped it.
  • 1½ cups Arugula, chopped
  • ¾ cup Cheese, ½ cup Monterey Jack and ¼ Parmesan
  • 2 large Eggs, beaten
  • ¼ cup Trader Joe's Red Pepper Spread with Eggplant, trust me...you need this in your life.
  • 6-8 sprigs Thyme
  • Muffin tin, regular or large
Preheat your oven to 350℉.
Sooo, throw all of it (except the Parmesan!) in a bowl large enough to get a good mix on things.  Seriously. All I ask is that you do spend the time to really incorporate the ingredients.  Then once the ingredients are all mixed thoroughly, divide your batter into your muffin tin.  They won't be rising so just fill those buggers to the tipity top.  Then top the "cupcakes" with your Parmesan.

Now, I used the large muffin tin and this made six FULL "cupcakes".  Next time I won't be so short sighted and I will double the recipe.  It was that big of a hit.  You all know how I feel about recipes that all 3 of my lovelies enjoy!  Once they are filled, pop them in the oven for 30 minutes or so.  I would start checking them at 20 minutes since the old cooker can vary dramatically from one to another.  I served them with some sauteed trombocino squash and onions but a salad and nice bread would work great here as well.  I liked that the Parmesan was nice and golden and...damn, now I want to make these again!

And don't you worry...the other two recipes will be coming your way soon!  ❤

Bon Appetit...it's time to eat!
Kathi

Sunday, July 29, 2012

Three Cheese Grilled Pizza

Let me start off by saying the beauty of this post is that you can use whatever you have on hand.  It's not so much a recipe, as it is an idea to work off of.  With that said...the pizza we (my husband  and I) made tonight was the best we have ever made.  Oh, did I mention another beauty of this post is that the husband and I cook this together?  If he's not home, the children and I don't make it.

I love grilled pizza night for many reasons.  It means the man is home, and while I always joke about loving my own space when he travels, I do miss him when he is away.  Quite a bit.  Just a little.  The second reason is because I can open up my fridge and see what I have and what needs to be used.  This is perfect for using up a little of this and a little of that.  The third reason is that the man and I most often times work in sync for this meal.  It's the little things that I can appreciate.  ☺ Another reason is that I won't get take out pizza this good or this fresh here.  Don't get me wrong, we have a few really great pizza joints, and I am not afraid of ordering from them.  They just aren't as good as what can come off of our grill.  There.  I said it.  Now go try this!

Here's What You Need...for what we made tonight:
  • Pizza Dough, make it yourself or buy it
  • Sauce, My version or a good jarred version are fine
  • Mozzarella, grated
  • Parmesan, shaved with a vegetable peeler 
  • Ricotta, the homemade version I do or a store bought version are fine
  • Onions, caramelized
  • Mushrooms, sauteed
  • Red Pepper Flakes
  • Basil, torn
There are a few tricks that The Husband has perfected with this whole process.  Take your dough out and let it sit on the counter for at least an hour, it will make it easier to stretch and work with.  Get your grill screaming hot.  Last, cook one side first and then put the toppings on that cooked side.  Yes.  Just continue reading.

My part in this whole process is to have all the toppings prepared.  That means I see what will work from the fridge, chop them and then cook them.  All toppings should be cooked because they aren't on the grill long enough to cook through.  I also am the one that gets the "pizza topping buffet" set up.  I clear off everything from our island and set the toppings out in bowls.  When we have company over and make these it is always inevitability a huge hit and it's easy for the children to make their own (which is the best part don't you know?).  The ricotta that I make is from Jennifer Perrilo on Food 52.  It is so completely wonderful, delicious and incredibly easy.  Did I mention delicious?

So once your grill is squawking and your dough is stretched out, oil both sides and throw it on the grates, then shut the hood.  Don't go anywhere because it will take about 90 seconds to 2 minutes to cook on this first side.  Once the first side is done take it off the grill and bring it to the topping bar.  

You want to top the side that has been cooked!  The raw side should be on the bottom.  For this pizza I put sauce first then red pepper flakes, ricotta, mushrooms, onions, Mozzarella, Parmesan and finally basil. 

 Once all the toppings are on, then the pizza goes back on the grill and the gas gets turned to low...put the hood down immediately.  This second turn on the grill will take a little bit more time than the first,  about 2-3 minutes.  Don't go anywhere and check it after 2 minutes so it doesn't burn.  What you are trying to accomplish here is cooking the dough and melting the cheeses.  Our pizza's usually turn out large so we take them off the grill with cookie sheets or cutting boards.

Once they come off the grill let them sit for a minute or two to cool.  If you try cutting into the pizza with the smoldering cheese it will just pool into the middle.  Let it set up and try to be as patient as you possibly can...not an easy feat for me.

A simple salad with this makes everyone happy but I have to admit, tonight it was just pizza...and a vodka tonic each for The Husband and I ❤
Bon Appetit...it's time to eat!

Sunday, July 15, 2012

Quinoa and Arugula Stuffed Mushrooms


This recipe is delicious any time of the year, but for me it's especially amazing when I can get most of the ingredients fresh from my favorite Fat Moon Farm.  The owner, Elizabeth, always teaches me something new when I go and I love seeing all the changes every week.  So, obviously not all of you have the luxury of a farm close by, but even buying your produce seasonally makes a huge difference in their tastes.  That being said, I do buy things from Trader Joes or another grocer out of season, I just know that it always makes my belly and my family a wee bit happier to have things taste their best.  And isn't that the greatest?
Let's talk about a few of the ingredients here first.  Quinoa is actually a seed...A SEED!  It's delicious and so good for you.  I beg you to give it a try.  It's got a great "chew" to it and is so versatile. I think I've talked before about most days having a big resealable bag of quinoa and another of either a brown or wild rice in my fridge.  I will usually make them on a Sunday and if it's football season it's not a huge bother because you just let it set on the stove top with the cover on!  I always find things to use it for and it also makes my life easier when I want something good but quick. 
Arugula...it's a green and it's amazing, but I will admit I'm not a huge fan of it raw.  Cooked and it's fantastic.  It wilts like spinach but doesn't lose it's body or get mushy like spinach does and it has so much flavor where spinach doesn't really do it for me unless I'm adding to it.  So good.  Elizabeth was telling me that she has a ton of it but no one is really buying it.  WHAT?  Fresh arugula isn't being purchased and scarfed down?  Oy.  I make a tremendous pesto with it as well...I really need to get on that post too!  ☺


Here's What You Need
  • Portabello Mushrooms (8)
  • Olive Oil
  • 4-5 Cloves Garlic, chopped
  • 1 Leek, chopped in half moons
  • 1 Medium Zucchini
  • 1 Yellow Squash
  • ½-1 teaspoon Oregano, depending on how much you love the herb
  • ½ Cup Peas, fresh or frozen
  •  Arugula, 3 large handfuls
  • Quinoa, 2 cups (cooked)
  • Wild Rice, 1 cup (cooked)
  • 1 Cup Feta
  • ¼ Cup Pine Nuts, toasted
  • 3 Tablespoons Basil
  • 2 Tablespoons Parsley
  • Tomato Sauce, My Version of Sauce or from a jar works too
  • Mozzarella

I have to use two 9½ x 11 dishes for this recipe, of course if you don't need 8 stuffed mushrooms just halve this recipe.  No biggie.  Brush the mushrooms with olive oil and place them gill side up in your dish.  A bit of pepper does nice things at this point as well...just saying.  Place them in a 375℉ oven for 20-25  minutes to roast.  While that's doing it's thing you can easily get the filling done.  This roasting is an important step because the filling will be completely cooked.  The first time I made this dish I didn't roast them first and then the quinoa was too crunchy on top from being in the oven too long.  Don't make that mistake.  Eeeek!

Leeks need to be cleaned really well.  They have layers and sand get's in there and biting down on gritty leeks is definitely one of my least favorite food things.  Cut the leek in half lengthwise then chop it in half moons.  I then take a large bowl, put it in my sink and add the leeks with as much water as possible.  Then I roll up my sleeves and rub the leeks between my hands, this breaks the moons up and the grit falls to the bottom while the leeks stay clean and pretty at the top.  Whatever you do, don't skip this step.  It takes 3 minutes.  Once you're done here, dry them a bit on a clean kitchen towel and add them to a large saute pan with 2 Tablespoons of olive oil.  Cook them for 2 minutes or so just to soften them then add in your garlic.    Now after 45 seconds the garlic should start smelling amazing.  The smell of garlic makes me instantly hungry.

Feel free to add in your squashes and oregano now and throw some salt and pepper in there while you're at it.   As I have said before, I like my vegetables to have some color on them so I like to caramelize mine a good deal.  If you like yours just softly sauteed then do that.  My recipes are all pretty forgiving and easily adjusted to your tastes.

While this magic is happening in your pan please get a large bowl and add in your quinoa, rice, feta, basil and parsley and mix them all to get aquainted.  If you have a party at your house you introduce people right?  Same with this only the party is in the bowl instead of your family room!  Actually, all good parties end up in the kitchen or wherever the booze is in my experience! 

Check on the squash mixture and if it's where you want it to be color wise,  add in your peas and arugula.  Don't forget to add in a little more of your S & P and you may also need to add another Tablespoon of olive oil too!  It should be nicely wilted in 2 minutes.  Now take the whole saute pan and add the contents to your rice bowl.  More guests have joined the party...introduce them and mix!!!

Now let me confess.  I burn things.  More specifically, nuts.  So when I have them in a recipe I always make sure I don't have anything else that needs my attention, I stand over that pan and watch them like a hawk.  Honestly.  If you are capable of toasting the pine nuts while introducing the rice and quinoa and sauteing squash, go right ahead.  Brag about it in the comments below if you must.  I will applaud you.  I am a master nut roaster only when it's all I have to do!  LOL!  Once yours are done, get them in the quinoa bowl and mix.

Please, before you try stuffing your mushrooms let them cool a bit.  I take them out of the pan they roasted in and cool them on another dish so I can add some sauce to the bottom of that pan.  Then add them back on top of the sauce.  Depending on the size of your shrooms they will take ⅓ to ½ cup of filling, I overfill mine.

Once every mushroom has been filled I top each with ¼ cup of additional sauce and then mozzarella.  Is it shocking that I REALLY pile on the cheese?  It just makes everything right in my world.

Everything is cooked at this point so you really just need to heat it all through and get your cheese all nice and melty.  Fifteen minutes should do the trick but if you want to brown the top of your cheese a bit you can also then throw on the broiler for a minute or two. 

There you have it.  Great meal, full of protein and happiness.  Serve it with a simple salad and dinner is ready.  Amazingly these can also be made the day before (I wait to top with the cheese until it's time to go in the oven though) and life is really easy!

Bon Appetit...it's time to eat!

Thursday, July 12, 2012

Mushroom and Pea Risotto

Let me warn you, I'm not starting this post the way I necessary should...but I never said I was a good rule follower. 
I used to really suck at risotto.  Badly.  My first attempt (probably 12 years ago) was delicious and my husband looked forward to the dish in the future.  It rarely happened ever again, it was always a hit or miss.  I didn't know why and it really pissed me off.  Over the years I have tortured him with "experiments", always with another dish on deck in case the risotto didn't pan out, pun intended.  Over the past year or two I have always managed to make risotto that everyone, all 5 of us, has raved about.  I think I have figured out what the problems where and they weren't that difficult.  Risotto is really a simple dish as long as you follow some easy steps.  I don't lie about these things! 
So my oldest baby (she's 10, whatever) had to have 4 teeth removed and needed a soft diet for a few days.  She requested a risotto dish and a Frittata Dish.  No problem.  Anything for my poor cherub!  This was what I came up with and everyone was thrilled!  Not an easy feat for a family with three girls, albeit amazing girls! 
 
Here's What You Need
  • 3 Tablespoons Olive Oil
  • 1 Tablespoon Butter, unsalted
  • ½ Large Onion, Chopped
  • 2 Large Portabella Mushrooms, Chopped
  • 1 Cup Arborio Rice
  • ½ Cup White Wine, Pinot Grigio is my "go to"
  • 5-6 Cups Vegetable Broth
  • 3½ Ounces Goat Cheese
  • ⅓ Cup Parmesan Cheese, I used my microplane
  • Zest of ½ Lemon
  • 1 Cup Frozen Petite Peas
  • Salt and Pepper, always
Start with the usual suspects...Olive Oil and Butter, in a large saute pan and the onions.  Cook them down for 2 minutes or so with some salt and pepper, then add in the mushrooms.  This should all cook for about 5 minutes until there is some nice color on them and then add in the rice.  Stir it around and get it coated in the mixture completely for 2-3 minutes.  Don't skimp on this step.
Now is the time to add in the wine!  I measure out the correct amount for the pan and then have a glass handy to fill for my own personal consumption.  It's my favorite step.  Don't judge me. 
Stir the rice until the wine is absorbed then it's time to add in the the broth.  Now I know I wrote "Vegetable Broth" on the ingredients list but please, feel free to use whatever you like.  I have a standard size ladle (not the over sized version) and add in two ladle fulls.  Stir, stir, stir.  Once it has been absorbed by the rice, add in two more.  I don't sit over the pan stirring the whole time, but quite often.  I am always close by and keeping an eye on what's happening.  This whole process takes about 25-30 minutes, it always varies for me, just like the amount of broth does.  I haven't figured this one out...but who cares.  It's delicious.
Risotto should be al dente.  Stick a spoon in that pan and try it at around 22 minutes to see where it is, you may have to add one more ladle and try it again in a few minutes.   Good?  Now add in the peas.  I like the petite peas rather than the regular ones but again, use what you have.  Stir it around then add in the cheese.  I break the goat cheese up to melt it a bit easier then once that's incorporated add in the Parmesan.  Stick another spoon in and try it again.  Check for salt at this point.  I never add too much in the beginning because the cheese tends to have a good amount of salt.  If it needs it, add it...if it's good, just enjoy it.
I serve this with roasted vegetables or grilled shrimp.  Sometimes I use it as a main dish and sometimes a side.  It's quite versatile in that way.  
Today because of "Toothless" I roasted  2 zucchini,  2 yellow squash and ½ of a sliced onion with olive oil, salt, pepper, 1 teaspoon of dried rosemary on 400℉ then add in  ¼ cup of both basil and flat leaf parsley.  It was perfect for her and scrumptious for the rest.
Bon Appetit...it's time to eat!

Frittata with Cheddar

Frittata's are one of my "I Have No Idea What I'm Making For Dinner And Have 3 Hungry Children Demanding Food Or They Will Die" meal.  I make it for everything...breakfast, appetizers for play dates, lunch with a salad, dinner with salad, side and grilled bread.  Name it...this works for it.  Unless it's a dessert party.  This would suck for that.
So this was the other request I had gotten from the largest one after she had to have 4 teeth extracted to make room in her mouth for big teeth and eventually braces.  The dentist tells me she has a small mouth but she sounds so freaking loud at home that I really had to sit back and question his degree.  I may have to go online and find out if he graduated from  an accredited school or an online version.  I'm not joking.
She also requested Risotto.  I made that too!  My poor baby!
Notice that adult beverage in the background?  My husband and I fight over who gets the pink straws...tonight I lost the battle but he was the one making the Vodka Tonics so I really didn't mind too much!  I'm not very happy with the picture but until I make it again, this is the best I can do for you.  My bad.


Here's What You Need
  • 1 Tablespoon Butter
  • 3 Tablespoons Olive Oil
  • ½ Onion, I use Vidalia or a sweet type usually
  • 1 Large Portabella Mushroom, chopped small
  • 1 Medium Zucchini, quartered and sliced
  • 1 Bunch Beet Greens, about 3 cups chopped
  • ¼ Cup Parsley
  • 10 eggs, beaten
  • ½ Cup Milk
  • 1 Cup "Seriously Sharp" Cheddar
Preheat your stove to 350˚.
As usual I start with a large pan, oven safe this time, butter, olive oil and onion.  Stir them around with some salt and pepper for a few minutes and then add in your mushrooms.  After a few minutes of these two getting to know one another add in the zucchini and saute them all until they are to your liking.  Personally I like mine with some color.  Next comes the beet greens...if you are afraid of them add in something else like spinach, arugula or kale.  I will say beets and their greens are some of my favorite things on the planet.  No joke.  While the veggies are working their magic crack the eggs, add the milk and whisk away.  I like to get a little bit of air into them.   Once your green of choice has wilted down enough to your liking (spinach will take no time, while kale will still keep it's body) spread the filling around the pan evenly and add in the egg mixture gently so as to not disturb the filling.  I keep the heat on medium/low to medium.  This is when you add your cheese...spread it around the top of the mix and just leave it.  Wait until the edges are just set, the middle will still be liquid and then put it on the middle rack of your stove.  This is where the oven proof pan comes in handy.  You will have to wait 13-15 minutes or just until the middle is set and not jiggling.
We cut ours like a pie and have hot sauce on the table.  If you're serving the frittata as an appetizer I cut it into 16th's.  If it's a main meal I cut it into 8th's and I serve it with a salad or other side.
Bon Appetit...it's time to eat!!!

Friday, May 11, 2012

Easy Green Stir Fry...I mean, Vegetable Medley!

I went to Trader Joes' this week and of course went in with a specific list and came out with so much more.  Again.  I can't help it, the place is magical.  I really hope my husband isn't reading this post.  Balls.  So as I was meandering around the joint I came across this bottle of TJ's Soyaki.  ***What the hell is this???*** I said, in my head.  Heaven on Easy Street is what it is I tell you!  It has all the things that a delicious medley needs in one shot...so for those nights that I just don't feel like grating ginger and mincing garlic etc. I can just grab this bottle and be done.  Those nights happen here sometimes, I'm sure you have them too.  Don't get me wrong, I love to cook but sometimes pulling everything out and putting it all away is the part I am over.  I just want easy.  Last night was one of them for me but my babies didn't care, they loved it!  And since my fridge was full from all the shopping I did when we came back from Disney, I had a ton to choose from for veggies.  Sweet!  All I really had to do was chop a few key ingredients and I was plating every ones dinner in 30 minutes!  Not bad for a Thirsty Thursday right?

Here's what you need for the Medley
  • 1 Onion, half moon slices
  • 2 cups Cremini Mushrooms, sliced
  • 1 1/2 cup Green Beans, cut in half lengthwise
  • 3 Garlic Cloves, minced
  • 1-2 teaspoons Siracha
  • 1 package Tofu, cubed
  • 1/2-3/4 cup Trader Joe's Soyaki Sauce
  • 2 Trader Joe's frozen Cilantro cubes
  • 4 Green Onions
Here's what you need for the Rice
  • 2 1/2 cups Jasmine Rice, cooked
  • 2 Tablespoons Olive Oil
  • 1 Tablespoon Sesame Oil
  • 1 cup Baby Sweet Peas, frozen
  • 1/2 Lime, zest and juice

Start by marinating the tofu in 1/2 cup of the TJ's Sauce for about 30 minutes.  Everything else will be done well before that.  Remember this is quick but delicious!

So while the tofu is hanging out and getting lovely (let's face it, it's not great unless you do something to it), slice the onions and get them in the wok with some olive oil.  Add pepper.  Always add pepper.
While they are in the wok slice the mushrooms and green beans...it won't take long, 3 minutes or so!
Once the onions are done put them aside in a bowl and then add the mushrooms to your wok.  You may need to add a bit more olive oil.  And pepper!  These beauties will take 4-5 minutes and then add them to the bowl with the onions.  
In my opinion, a kitchen can't smell much better than while cooking onions, mushrooms and garlic (remember the garlic is coming up).  Soooooo...now the mushrooms are done, put them in the bowl with the onions.  Wok...green beans...pepper...Siracha.  Saute 2 minutes and then add in the best ingredient you can cook with.  Yes, I'm talking about garlic.  Add.  It.  Stir it around for 1-2 minutes longer and then guess what?  Add it to the bowl with the onions and mushrooms.  Genius.  

Now comes the tofu.  Listen to me...add the tofu to the wok but NOT the marinade.  It will never brown if you do and will just steam the hell out of itself.  That's gross.  Keep the marinade aside while your tofu is browning up properly, 7-10 minutes. 
If you prefer a different protein, the marinade works with those too...chicken, beef, fish.  Just substitute.  No worries from me. 

Remember that bowl of veggies that's staring you in the face next to your stove?  Go ahead and add that business to your wok along with the marinade I told you to hold on to.  I hope you listened.  

Throw a couple of cubes of cilantro into your wok...or add some fresh if you prefer.  Since I was hanging out on Easy Street, this is what I used, and it works like a charm.  Tiny little cubes of chopped, frozen herbs, think ice cubes for herbs.  Each cube is 1 teaspoon of Cilantro, so if you use fresh throw in 2 teaspoons.  As you can tell math is one of my strong suits.  Bahahahahahaaa! 

Stir everything around and here's where you need to decide if you need a bit more of the marinade...I used a splash more, but don't go crazy.  Get a serving plate and clear that pan out.  Now add the green onions on top.  Look at how delicious it looks!

So for the rice, let me be honest.  I cheat.  If I am making rice, I always make more than I need.  Much more.  And when it comes to a stir fry type of rice, cold leftover rice works best.  Ask Mark Bittman.  I love him.  Google if you must.  Then follow him.  Add the rice to the wok with the olive oil and sesame oil (never just add sesame oil, it will burn and taste nasty, and nasty isn't good!).  And don't go washing the wok either.  There's no need.  Whatever is left from making the medley will just flavor the rice.  Don't be wasteful.  Once the rice has warmed, 3-4 minutes kindly add the peas, lime zest and juice.  The peas should still be frozen when you add them but they are little buggers, they will defrost quite fast so don't worry about it.  
At this point I want you to let the rice and peas get hot in the wok.  Get some plates and utensils, hell I don't care if you use a fork or chop sticks, just get something to get this goodness into your face.
Bon Appetit...it's time to eat!

Tuesday, April 24, 2012

Pasta with Beets and Feta

I had moved to the town we are currently residing in almost a year and a half ago.  My first "people" that I bonded with were the librarians at the Public Library.  Nancy runs the children's portion of the library, complete with a crown.  Yes, a crown.  And she deserves it.   She is an avid gardener and was telling me about this recipe she makes for her daughter, Mary, who is Vegetarian.  I was salivating.  She sent me the recipe and when I made it I thought I had died and gone to heaven.  It's another one of those recipes that totally scores because everyone loves it.  Of course the children also love that it turns their pee and poo pink...alright, I happen to find it funny too!  Whatever.
Nancy's original recipe calls for Oranges instead of Clementines, I use whichever I have on hand.  Both ways are delicious.  I also add Arugula to the Beet Greens because #1 I always have Arugula in my fridge and #2 I love greens.  The best part of this recipe is that it is amazing hot, room temp or right out of the fridge.


Here's what you need:
  • 6-8 fresh beets, with greens
  • Clementines, enough for 3/4 cup juice.  I used 10.
  • 1-2 Limes
  • Zest from 3 Clementines and 1/2 lime
  • 1/2 cup Olive Oil
  • 5 Garlic Cloves, minced
  • Arugula, 1 large handful
  • Beet Greens, chopped
  • 1-1 1/2 cups Feta
  • 1 pound of Pasta, your choice

Roasting beets is easy peasy...cut the tops off and the little "tail".  DO NOT peel them.  Just some Olive Oil, Salt and Pepper and a cookie sheet...throw them in a 375˚ oven for about 40 minutes.  A paring knife should easily pierce the beets when they are done.  I also have done this step the night before if I have the oven on anyway...little bit of a time saver for me.  Once the beets are cooled you can peel them very easily. Then cube them and set them aside.
I grab the largest pan I have and add the Olive Oil and chopped garlic.  I know 1/2 cup sounds like a lot but it's going to make the sauce for all of that goodness.  Get the garlic nice and golden...not too much though, overcooked garlic is bitter and nasty.
Once the garlic is smelling good add in the juice from both citrus' and let it reduce for about 10 minutes.  Add in the Beets, Salt and Pepper and let it simmer while your pasta is cooking.  When the pasta is almost done add in the greens to the saute pan with the beets and let them wilt.  It won't take long.
 Drain the pasta (no need to save any of the pasta water this time around.) and put it back in the pot it came from.  Add all the goodness from the saute pan to the pot and mix it well.  I usually add half the Feta at this point and keep the rest for the table for people to add as they see fit.  This post is almost finished so I won't rant about my love for cheese...this time!
Bon Appetit...it's time to eat!

Sunday, April 22, 2012

Quesadilla Night!

So I brought the "babies" to the library last week.  The oldest had her book club meeting and the 2 littles and I  were hanging out chatting it up with one of my librarian friends, Seana.  We always talk about our two favorite things, our children and food.  She lived in Italy for quite some time and let me tell you she is one of my favorite people to talk food with!  So it being a Tuesday and usually my craziest day of the week she asked what we were having for dinner...thankfully I had planned ahead early and had made guacamole...so I could bust out Quesadilla's later!  Let me explain a few things...the first baby (she's almost 10) won't eat Mexican unless there is guacamole.  The middle baby (she's 8) won't eat Mexican without sour cream.  The actual baby (FINE!  She's 5!!!) most times eats them plain or with a bit of sour cream.  Quite frankly, I don't care how they eat them...just that they eat what's put in front of them!


Here's what you need for the Guacamole:

  • 5 Haas Avocado's
  • 1-2 limes (4 Tblsp. juice) and zest of 1
  • 1/4 cup Cilantro
  • 1/2 pint Grape Tomatoes (quartered)
  • 1/2-1 Jalapeno, finely diced
  • 1 small onion (1/3 cup), diced

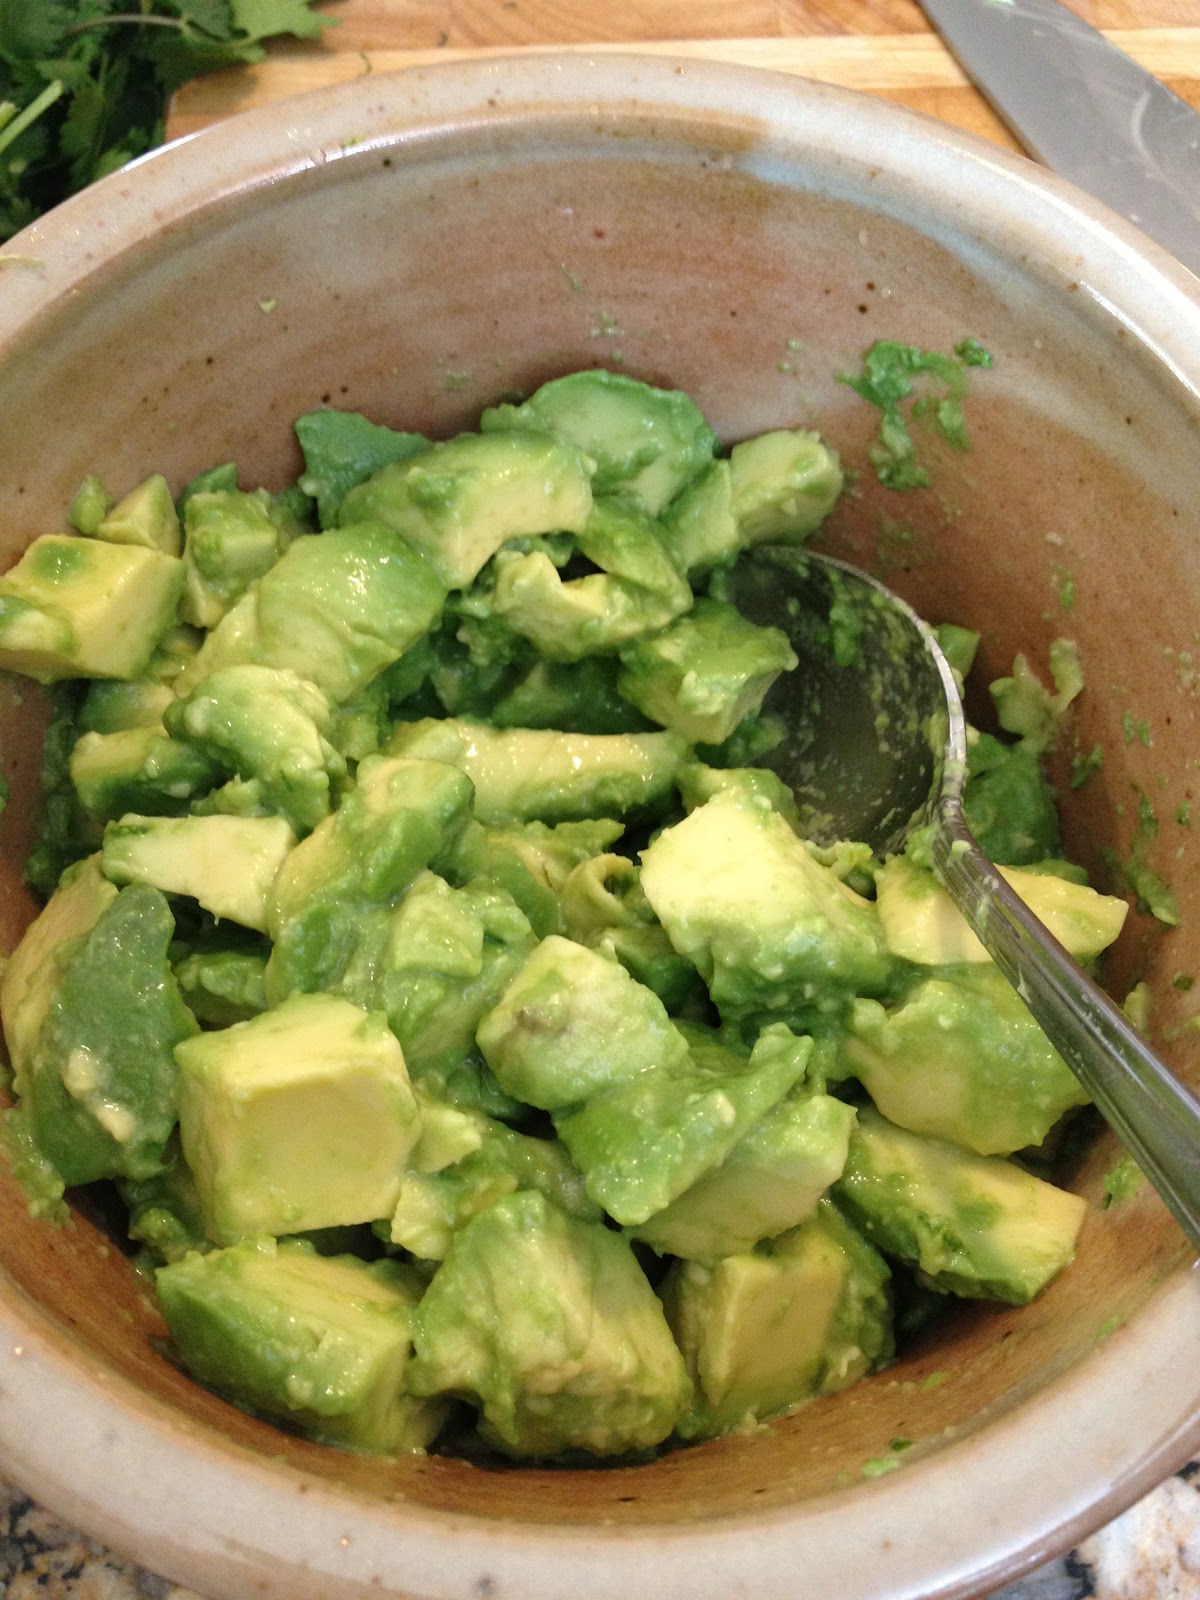
I start by halving the avocado and then cubing it while it's still in it's "shell"...
Then scoop the fruit out with a spoon...
With the other half take your knife and remove the pit...just chop and twist and it will come right out.
Be careful and use your thumb to "pop" the pit right off the knife...
I try to remove the avocado into the bowl rather quickly so I can add the lime and it doesn't oxidize.  As soon as you're done, squeeze that citrus into the bowl.
I cut my jalapeno length wise first...it's a wee bit blurry but you get the point.  ;-)
Then dice it fine...and yes, that's me with gloves on.  I have gotten "burned" by the pepper before and I NEVER want it to happen again.  Ever.


Chop the rest of the veg and add it...it will take a few minutes to do but, it will be so worth it.  You can make the guacamole earlier in the day and let it sit or not...it's delicious either way.

Here's what you need for the Quesadilla's:


  • Whole Wheat Tortillas (I get the big package at Costco)
  • Mexican Cheese
  • 1 large Onion, chopped
  • 3 Garlic Cloves, chopped
  • 1 teaspoon Chili Powder
  • 1/2 teaspoon Cumin
  • 1 large Sweet Potato, grated
  • 1 can rinsed Black Beans
  • Salt and Pepper
  • 3 large Tblsps of Cilantro...hell just make it 4 Tblsps and then it's just 1/4 cup!
I always start with onion, saute it in some olive oil until it's pretty.  You know what that looks like.  Salt.  Pepper.  Garlic.  Chili Pepper.  Cumin.  It's heavenly.
Add in those sweet, Sweet Potatoes and let them cook down a bit.
Once they are cooked down and caramelized, about 15 minutes, add in the black beans and cilantro.  They don't need to cook, just warm through a bit.
Now let me confess...I love some specialized cooking units...a bread machine, a panini press, an ice cream maker.  My most prized possession is the Quesadilla maker.  I got it from Target, $20.
I always spray the plates with a non-stick spray then lay the tortilla down with a little bit of cheese.
Then some of the filling...
And then some more cheese before the top tortilla.  The cheese acts like a sort of glue so your dinner doesn't fall apart before it hits your face.  It's one of the perfect foods of the world.  ;-)
The little ladies and I like ours with a bit of crunch and color to them...

Like I said before, I always need the guac and the sour cream for everyone to be happy.  I sometimes have a rice salad or a green salad to go along with this meal.  If it's summer time and corn season then grilled corn on the cob is always on deck.  A light side dish is perfect for this meal either way. 
Bon Appetit...it's time to eat!

Saturday, March 31, 2012

Zucchini Pasta

This recipe is my variation of one I had gotten from my friend Kristi, one of many delicious recipes I might add!  It was last summer when everyones zucchini plants were going insane in their gardens, what perfect timing!
I find myself saying a recipe is a huge success when everyone is eating what I cook rather than making themselves a peanut butter sandwich or a bowl of cereal.  Yes.  You heard me right.  If the wee ones don't like what is served, they make their own dinner.  Since they are not big enough to use the stove,  those are the only options for them to do independently.  It happens, but not often.  This recipe is a rather large success for sure and they love the leftovers for school lunches!


Here's what you need:

  • 2 1/2 pounds of zucchini and yellow squash (or all of one)
  • 1 onion, thinly sliced (I always have a vidalia or a sweet onion)
  • 4-5 garlic cloves (chopped)
  • 2 tsp 21 Season Salute (Trader Joes is the place to get this)
  • 1/4-1/2 tsp red pepper flakes (it really depends on how spicy you like it)
  • 1/4-1/2 cup sun dried tomatoes, julienned
  • 1 1/2 cup parmesan cheese, grated
  • 12-15 leaves Basil, chopped
  • Parsley, 3 Tblsp chopped
  • Lemon, zest and juice
  • 8 oz long pasta (I use 4 oz of whole wheat pasta and 4 oz of white)
While you are getting the rest of the ingredients together throw a large pot of water on the stove to start boiling.  It's a time saver for sure.
Now get to work on that zucchini/squash, or both.  What you are looking for here is to peel the squash until you start hitting the seed core.  No need for those seeds in this recipe.  I make a lengthwise peel, then rotate it a bit...repeat.  You will wind up with a big old pile of zucchini/squash "pasta" in no time.  Ignore the pink in the background...I think it's a bag of romaine hearts.  Whatever.  


Chop your garlic and slice your onions thinly.  I don't think I should even have to consider them to be actual ingredients...they should be treated like olive oil, salt and pepper as far as I'm concerned, just a given.  You know you need them in the recipe to make everything taste good so just automatically add them to everything...unless you're baking.  That would just be nasty.


Once the water starts to boil add in your pasta.  While it's cooking you can get the rest of the dish cooked.  It's that quick.  Just make sure you have everything else ready before you drop those noodles in the water.


So the best pan I find to use to cook all the vegetables up in is my wok.  A few tablespoons of olive oil in there should work just fine.  Once that's nice and hot add in the onions for a few minutes before adding in the garlic.  Prepare yourself...in about a minute thirty seconds the house is going to smell amazing.  


Add in the 21 Season Salute, red pepper flakes, and sun dried tomatoes to the mix.  If you don't have a Trader Joe's near you to get this seasoning, first, I would like to extend my condolences, second, try some Italian Seasoning you can get anywhere, it won't be as good but it will do.  Seriously, I may need a moment of silence for anyone who doesn't have a TJ close by.  Sigh.
Grate your cheese while this magic is going on.  There isn't much better in my opinion than freshly grated Parmesan.  


OK.  Now add in the zucchini/squash "pasta".  


This will not take long since they are so thinly sliced. 
Mix it all up in the wok so that nothing burns on the bottom.  In about three minutes you will be close to eating.  At this point I am telling the wee ones to get the table set for dinner.  You want it ready so that when this dish is done you can just sit and stuff your face.  
Before you drain your pasta, keep a cup of pasta water aside to help with the sauce.  I put the pasta back in it's pot and then add in the wok goodies, a few more tablespoons of olive oil, the basil and parsley.   Don't forget to zest your lemon and then juice the whole thing in.  Zesting a lemon that has already been juiced isn't easy, trust me.  The husband insists that he hates zest but I put it in a ton of dishes (of course I don't tell him this!) and he loves it.  Men.  
See where you are at and add about 1/4 cup of the reserved pasta liquid, if you think you need a bit more...do it.  I never need the whole cup.
Put this pot of heaven in a large serving bowl and then make it rain with parmesan, about 3/4 cup.  The rest I reserve for the table.
I usually serve this with a simple salad of romaine (Remember?  It was on the counter in the background?) with basil and parsley, some tomatoes and cucumbers or whatever veg is in the fridge and a vinaigrette.  French or Italian bread...either works just fine for me.

Bon Appetit...it's time to eat!